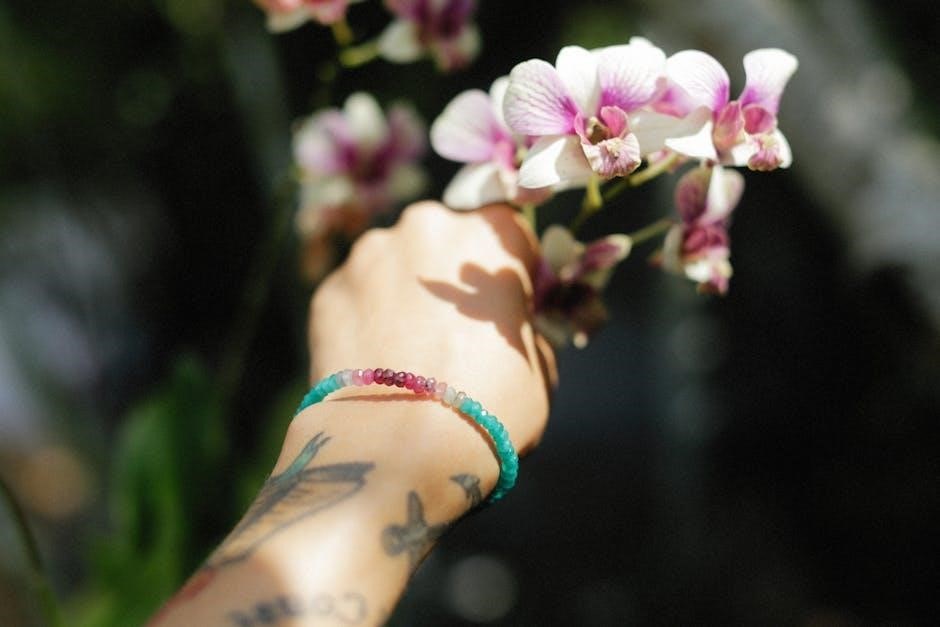
Daisy chain bracelets, celebrated for their delicate floral aesthetic, offer a charming entry point into the world of beadweaving․
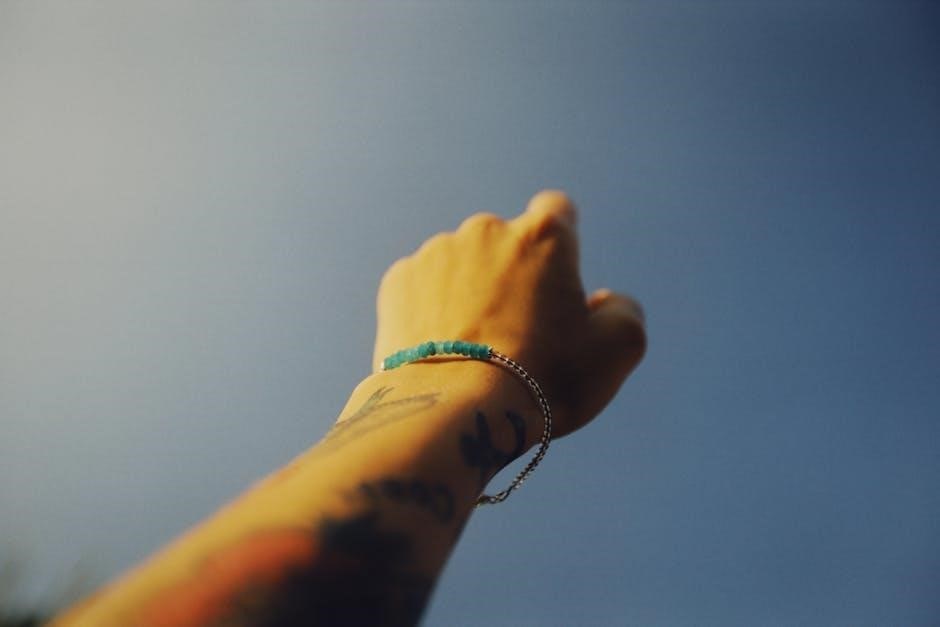
These simple beaded flower patterns are incredibly versatile, allowing for creative expression with colors and bead types․
Beginners find these projects accessible, while experienced crafters appreciate the opportunity for intricate variations․
Explore tutorials from sources like Bee Jang Creations and Amalieeide for inspiration!
What is a Daisy Chain Bracelet?
Daisy chain bracelets beautifully mimic the traditional childhood craft of linking daisies together, but utilize beads instead of flowers!
These bracelets are characterized by a repeating floral motif, constructed by looping beads to form ‘petals’ around a central bead․
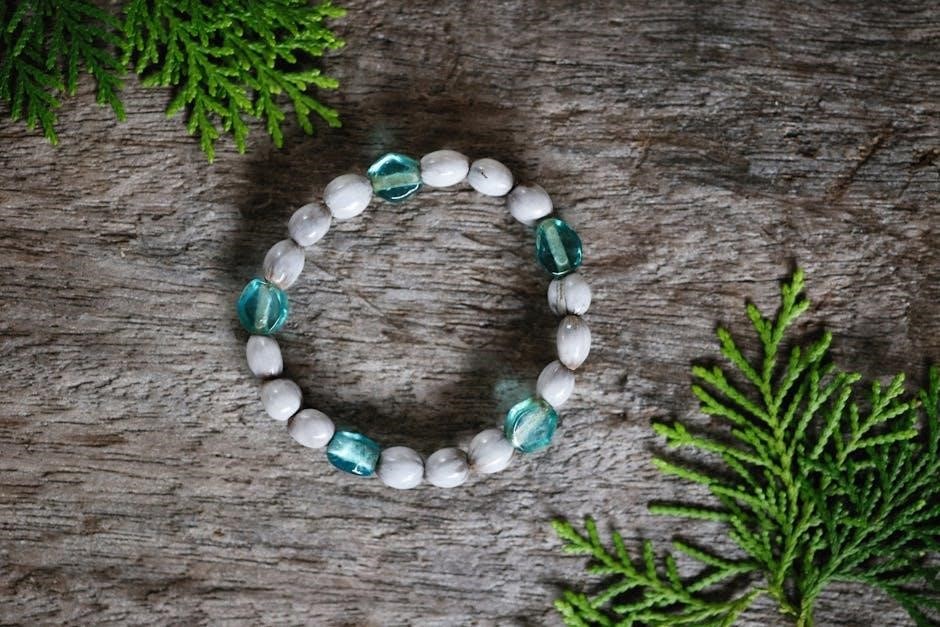
Tutorials, like those found on PandaHall, demonstrate how faceted glass beads or even pearl beads can be used to create these delicate designs․
The result is a lightweight, visually appealing accessory, perfect for summer wear or adding a touch of whimsy to any outfit․
Why Choose a Simple Beaded Flower Pattern?
Simple beaded flower patterns, like the daisy chain, are ideal for beginners due to their repetitive nature and straightforward techniques․
These patterns build confidence and foundational skills in beadweaving, such as stringing, looping, and knotting․
Resources like Beads Magic offer ‘quick and open’ patterns, perfect for a fast and satisfying project․ Beyond ease, these designs offer endless customization – experiment with color combinations and bead types for a unique, personalized piece!
Materials Needed for Your Bracelet
Essential materials include seed beads, glass beads, and optional pearl beads for a delicate touch․ You’ll also need beading thread, needles, scissors, and a bead mat․
Bead Types: Seed Beads, Glass Beads, and Pearl Beads
Seed beads form the foundational structure of daisy chain flowers, offering precision and detail․ Glass beads, particularly faceted varieties as seen in PandaHall tutorials, add sparkle and dimension to petals․
Pearl beads introduce an elegant, classic touch, creating delicate flower centers or enhancing the overall design, as demonstrated in pearl flower bracelet tutorials․ Consider bugle seed beads for framing petals, inspired by Bee Jang Creations, to elevate your floral aesthetic․
Thread or Stringing Material
Selecting the right thread is crucial for a durable and beautiful daisy chain bracelet․ Nymo thread is a popular choice for beadweaving, offering strength and flexibility․
For stretch bracelets, elastic cord provides convenience, though it may limit intricate designs․ Consider FireLine for robust projects․ Ensure your thread color complements your beads! Consistent tension, vital for neat flower formation, is easier to achieve with quality thread․
Tools: Beading Needles, Scissors, and Bead Mat
Essential tools streamline the daisy chain bracelet creation process․ Beading needles, specifically size 10 or 12, facilitate easy bead stringing․ Sharp scissors are vital for precise thread trimming․
A bead mat prevents beads from rolling, saving time and frustration․ Consider bead stoppers to secure beads during work․ These simple additions enhance control and efficiency, making your beading experience more enjoyable!
Basic Beading Techniques
Stringing beads is fundamental, followed by mastering creating loops for petal formation․ Secure knots are crucial for bracelet durability and a polished finish․
Stringing Beads
Stringing beads forms the foundation of any beaded bracelet, including delicate daisy chains․ Begin by cutting a comfortable length of your chosen thread or cord․
Thread a beading needle, then carefully string beads onto it, following your desired pattern․ Maintaining consistent tension is vital for a neat and even appearance․
For daisy chains, typically you’ll start with a core of beads, then build petals around it․ Remember to leave enough tail for secure knotting and finishing!
Creating Loops
Creating loops is essential for forming the petals of your daisy chain flowers․ After stringing a set of beads for a petal, gently curve the thread back on itself, forming a loop․
Pass the needle back through several of the previously strung beads to secure the loop in place․
Adjust the loop size to achieve the desired petal shape․ Consistent loop sizes contribute to a uniform and aesthetically pleasing floral design․ Practice makes perfect!
Securing Knots
Securing knots is crucial for the durability of your daisy chain bracelet․ After completing a section, or when changing thread, tie a secure overhand knot close to the beads․
Add a tiny drop of clear craft glue to the knot for extra reinforcement, preventing unraveling․
Carefully trim the excess thread, leaving a minimal tail․ Consistent knotting ensures a polished finish and prevents beads from loosening during wear․
Daisy Chain Flower Pattern ⏤ Step-by-Step
Crafting a daisy chain involves forming a base, adding petal rows, and building upon that foundation․ Tutorials guide you through stringing beads and creating loops․
Follow these steps for a beautiful, handmade bracelet!
Step 1: Forming the Daisy Chain Base
Begin by threading your beading needle with a comfortable length of stringing material․ String four beads of your chosen color – these will form the initial petals of your daisy․
Next, thread one contrasting bead, often gold or a complementary hue, to create the flower’s center․ Carefully pass the needle back through the first bead, forming a loop․
Repeat this process, creating a continuous chain of looped beads, establishing the foundational structure for your daisy chain bracelet․ Ensure a gentle tension for a neat appearance․
Step 2: Adding the First Row of Petals
With the daisy chain base established, begin adding the first row of petals․ For each flower, thread a bead onto the needle and pass it through the loop created in the base․
Repeat this process, adding beads around the central bead, forming a complete flower․ Maintain consistent tension to ensure each petal sits neatly against the others․
Continue adding flowers along the chain, spacing them evenly to create a visually balanced and charming floral pattern․ This builds the bracelet’s core design․
Step 3: Building Subsequent Flower Rows
To expand the daisy chain, create subsequent rows of petals by repeating the process from Step 2․ Position new flowers within the spaces between those in the first row, building outwards․
This layering technique adds depth and fullness to the bracelet’s floral design․ Experiment with different bead colors for each row to create visual interest and highlight the flower shapes․
Ensure consistent spacing and tension for a polished look, gradually forming a beautiful, blossoming daisy chain pattern․
Variations on the Daisy Chain Design
Explore creativity by altering color schemes, incorporating bugle beads for petal framing, or adding focal beads and charms․
These modifications personalize your daisy chain bracelet, elevating a simple beaded flower pattern into a unique statement piece․
Using Different Color Combinations
Experimenting with color is a fantastic way to personalize your daisy chain bracelet! Consider classic pairings like white and yellow for a traditional daisy look, or venture into bolder combinations․
Pastel shades create a delicate, springtime feel, while vibrant hues offer a more energetic aesthetic․
Don’t be afraid to use contrasting colors for the flower centers and petals to make them pop․ Tutorials often showcase diverse palettes, inspiring your own unique beaded flower patterns!
Incorporating Bugle Beads for Petal Framing
Bugle beads, with their elongated shape, add a beautiful textural element and definition to daisy chain petals․ Framing each petal with bugle beads creates a delicate, almost lace-like effect, enhancing the flower’s visual appeal․
Bee Jang Creations demonstrates this technique effectively, showcasing how bugle beads accentuate the beaded flower patterns․
This subtle addition elevates the bracelet’s sophistication, transforming a simple design into a more intricate and eye-catching piece․
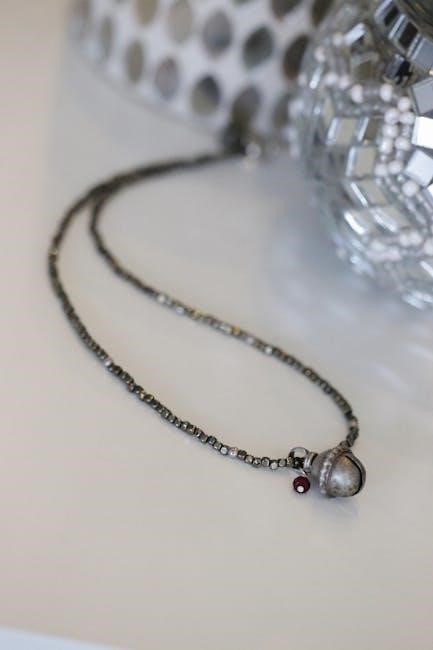
Adding a Focal Bead or Charm
Enhance your daisy chain bracelet by incorporating a focal bead or charm, creating a personalized and striking centerpiece․ A larger, contrasting bead draws the eye and adds visual interest to the delicate beaded flower patterns․
Charms, reflecting personal interests, further customize the design․ Consider the bracelet’s overall aesthetic when selecting a focal point․
This simple addition transforms a classic design into a unique statement piece, showcasing individual style and creativity․
Advanced Techniques for Flower Detail
Daisy chain bracelets can be elevated with techniques like triangle weave for crystal luster flowers and Hana-Ami motifs․
These methods add depth and complexity, transforming simple beaded flower patterns into stunning, intricate designs․
Triangle Weave for Crystal Luster Flowers
Triangle weave is an advanced beading technique ideal for creating shimmering, realistic flower petals․ This method utilizes tiny seed beads to form a dense, triangular structure, providing a strong base for crystal beads․
By strategically placing crystals within the weave, you achieve exceptional luster and dimension․ It’s a fantastic way to enhance simple beaded flower patterns, adding a touch of elegance and sophistication to your daisy chain bracelets․
Experiment with different crystal colors and sizes to achieve unique floral effects!
Hana-Ami Flower Motifs
Hana-Ami, a Japanese bead weaving technique, allows for the creation of incredibly detailed and realistic flower motifs․ This method involves building petals individually, then assembling them to form a complete flower․
Combining Hana-Ami with simple beaded flower patterns elevates your daisy chain bracelets, offering intricate designs beyond basic floral arrangements․ The document suggests integrating these motifs for a refined, artistic touch․
Explore various color combinations and bead types to personalize your floral creations!
Bracelet Closure Options
Daisy chain bracelets benefit from diverse closures! Options include adjustable sliding knots, lobster clasps with jump rings, or elastic cord for stretch bracelets․
Choose a closure that complements your design and skill level for a polished finish․
Adjustable Sliding Knot Closure
Adjustable sliding knot closures are ideal for daisy chain bracelets, offering a customizable fit without clasps․ This technique involves using cord or thread to create a knot that slides along the bracelet ends․
To create this closure, form a loop with one end of your bracelet string, then create a series of sliding knots around both strands․ Pull the knot ends to tighten and adjust the bracelet’s size․ This method is beginner-friendly and adds a rustic charm to your beaded flower design․
Lobster Clasp and Jump Ring Closure
For a secure and professional finish, a lobster clasp and jump ring closure is an excellent choice for your daisy chain bracelet․ Attach a jump ring to one end of the bracelet string, then securely fasten a lobster clasp to the jump ring․
Repeat this process on the other end of the bracelet․ This closure provides a reliable fastening mechanism, ensuring your beaded flower creation stays securely on your wrist․ It’s a classic and durable option․
Elastic Cord for Stretch Bracelets
Creating a daisy chain bracelet with elastic cord offers a wonderfully simple and comfortable option, perfect for beginners․ String your beaded flower design onto the elastic, ensuring a snug but not overly tight fit around your wrist․
Secure the ends with a strong knot, adding a drop of glue for extra hold․ This method eliminates the need for clasps, making it quick and easy to wear your beautiful creation!

Troubleshooting Common Beading Issues
Beading can present challenges! Tangled thread, dropped beads, and inconsistent tension are common․ Patience and careful technique are key to overcoming these hurdles during your daisy chain project․
Dealing with Tangled Thread
Thread tangles are a frequent frustration when creating daisy chain bracelets․ Gently lay down your work and carefully untangle the knot, avoiding forceful pulling which can weaken the strand․
Using a longer length of thread initially can minimize tangling, as it provides more slack․ A bead mat helps prevent rolling and further entanglement․ Consider thread conditioners to smooth the fibers and reduce friction during the beading process․
Regularly check your thread for twists and untwist it before continuing to string beads, maintaining a smooth workflow for your flower pattern․
Fixing Dropped Beads
Inevitably, beads will drop during your daisy chain bracelet creation! A bead mat is your first line of defense, catching stray beads․ If a bead escapes, carefully locate it – good lighting is essential․
Use a bead scoop or tweezers to retrieve dropped beads, avoiding disrupting your existing work․ If a bead rolls under furniture, a vacuum cleaner with a hose attachment can be helpful․
Re-string the dropped bead, ensuring it’s securely placed within your flower pattern, maintaining the integrity of your beaded design․
Maintaining Consistent Bead Tension
Consistent bead tension is crucial for a polished daisy chain bracelet․ Too loose, and your flower pattern will be floppy; too tight, and it may pucker or break․
Gently pull the thread after each bead, but avoid over-tightening․ Aim for a snug, even feel throughout your work․ Practice makes perfect!
Regularly check your tension, especially when changing bead sizes or colors․ This ensures a uniform and professional finish to your simple beaded creation․
Finding Inspiration and Further Tutorials
Explore daisy chain bracelet ideas from Bee Jang Creations, Beads Magic, and PandaHall! Discover tutorials for simple beaded flower patterns and unique designs․
Amalieeide also offers lovely, easy-to-follow beaded flower bracelet DIYs for beginners․
Bee Jang Creations — Bugle Bead Petal Framing
Bee Jang Creations presents a captivating technique for enhancing daisy chain bracelets: utilizing bugle beads to beautifully frame each flower petal․ This method adds a refined texture and visual interest to simple beaded flower patterns․
The delicate framing created by the bugle beads accentuates the floral design, elevating the bracelet’s overall aesthetic․ This tutorial is perfect for those seeking to add a touch of elegance and sophistication to their beaded flower creations, offering a unique twist on classic designs․
Beads Magic — Ivera Bracelet Tutorial (Quick & Open Pattern)
Beads Magic offers the Ivera bracelet tutorial, a fantastic resource for crafters seeking a quick and easily achievable daisy chain inspired design․ This open pattern is exceptionally beginner-friendly, making it ideal for those new to beaded flower construction․
The tutorial streamlines the process, allowing for rapid completion without sacrificing aesthetic appeal․ It’s a perfect starting point for exploring simple beaded flower patterns and building confidence in basic beadweaving techniques․
PandaHall Video Tutorials — Spring Flower Bracelet
PandaHall provides comprehensive video tutorials demonstrating the creation of a beautiful spring flower bracelet, perfect for learning daisy chain techniques․ Utilizing faceted glass beads, this tutorial guides viewers through each step with clear visuals and instructions․
It’s an excellent resource for beginners wanting to master simple beaded flower patterns, offering a practical approach to beadweaving and floral design․ The video format enhances understanding and encourages creative exploration․
Daisy Chain Bracelet with Pearls
Pearl embellishments elevate the classic daisy chain, creating a delicate and sophisticated bracelet․ These designs offer a refined take on simple beaded flower patterns․
Explore tutorials for crafting a delicate daisy chain using pearls, adding a touch of elegance to your handmade jewelry collection․
Simple Pearl Flower Bracelet Design
Creating a pearl flower bracelet begins with a foundational daisy chain base, utilizing seed beads for structure and flexibility․ Each “petal” is formed by stringing several pearl beads, carefully arranged to mimic natural flower shapes․
This simple beaded flower pattern emphasizes the lustrous beauty of the pearls․ Beginners can easily adapt this design, experimenting with different pearl sizes and colors․ Focus on consistent tension for a polished finish, and consider adding a delicate clasp for secure wear․
Tutorials demonstrate how to achieve a graceful, flowing design․
Creating a Delicate Daisy Chain with Pearls
A delicate daisy chain crafted with pearls offers an elegant twist on the classic beaded bracelet․ Begin by stringing seed beads to form the chain’s base, then carefully incorporate pearl clusters to represent each flower․
This simple beaded flower pattern highlights the pearls’ inherent sophistication․ Maintaining consistent bead tension is crucial for a refined look․ Explore tutorials for guidance on achieving graceful curves and secure knots, ensuring a lasting, beautiful piece․
Experiment with varying pearl sizes!
Fan-Shaped Teardrop Glass Beaded Bracelet
Teardrop beads beautifully mimic flower petals, creating a fan-like bloom․ This design offers a unique take on the daisy chain, adding volume and visual interest․
Explore tutorials for achieving the desired shape and secure construction!
Using Teardrop Beads to Form Petals
Teardrop beads are ideal for replicating the graceful curves of flower petals in your beaded bracelet․ Stringing multiple teardrops around a central bead establishes the petal structure․
Experiment with varying bead colors and sizes to achieve different floral effects․ Consider using a contrasting color for the center to enhance the flower’s focal point․ Tutorials demonstrate how to arrange these beads to create a realistic, fan-shaped blossom, adding depth and texture to your daisy chain design․
Achieving a Fan-Like Flower Shape
To create a captivating fan-shaped flower, strategically arrange teardrop beads radiating outwards from a central point․ This technique mimics natural petal arrangements, adding visual interest to your beaded bracelet․
Gradually increase the number of beads in each successive row to widen the fan․ Tutorials often suggest using a firm tension while stringing to maintain the shape․ This method results in a blossoming effect, perfect for a vibrant and eye-catching daisy chain pattern․
Poinsettia Flower Lace Bracelet Inspiration
Poinsettia designs can inspire stunning beaded bracelets, offering a unique twist on traditional flower patterns․
Emulate a lace-like effect through intricate beadwork, creating a festive and elegant accessory․
Adapting Poinsettia Designs for Beaded Bracelets
Adapting poinsettia motifs for bracelets involves translating the flower’s layered petal structure into beadwork․ Begin by sketching a simplified poinsettia shape, focusing on the prominent petal arrangement․ Utilize red and green beads to capture the plant’s iconic colors, and consider incorporating gold or pearl accents for a touch of elegance․
Experiment with different bead sizes and shapes to create texture and dimension․ Tutorials often demonstrate techniques for building up layers, mimicking the flower’s fullness․ Remember to prioritize a comfortable fit and secure closure when designing your beaded poinsettia bracelet․
Creating a Lace-Like Effect with Beadwork
Achieving a lace-like effect in beaded bracelets relies on strategic bead placement and openwork designs․ Employ techniques like picot edging or creating delicate arches with seed beads to mimic the airy quality of lace․ Utilize smaller beads and a fine thread to enhance the illusion of intricacy and lightness․
Consider incorporating bugle beads or crystal accents to add sparkle and definition․ Tutorials demonstrate how to build these delicate structures, often inspired by floral or geometric patterns, resulting in a stunning, ethereal bracelet․
Resources for Bead Patterns and Supplies
Amalieeide offers DIY beaded flower bracelet ideas, while Beads Magic provides the Ivera bracelet tutorial․ Online bead stores supply necessary materials for your projects!
Amalieeide ⏤ DIY Beaded Flower Bracelets
Amalieeide presents a delightful collection of DIY beaded flower bracelets, showcasing lovely color palettes and designs that are remarkably easy to replicate․ Their tutorials are perfect for beginners venturing into the world of beadwork, offering clear instructions and visual guidance․
You’ll discover patterns utilizing various beads, including seed beads, glass beads, and pearls, to create charming floral motifs․ These bracelets are a fantastic starting point for mastering simple beaded flower patterns and exploring your creativity with different color combinations․
Amalieeide’s focus on accessible designs makes learning the craft enjoyable and rewarding, inspiring you to create your own unique beaded flower bracelets․
Online Bead Stores and Suppliers
Embarking on a daisy chain bracelet tutorial requires access to quality beads and supplies․ Numerous online bead stores cater specifically to beadweaving enthusiasts, offering a vast selection of seed beads, glass beads, pearl beads, and necessary stringing materials․
These suppliers often provide detailed product descriptions and helpful resources for beginners․ Explore options to source everything needed for simple beaded flower patterns, from basic starter kits to specialized beads for advanced designs․
Convenience and variety make online shopping ideal for fueling your creative journey!
Care and Maintenance of Your Beaded Bracelet
Daisy chain bracelets, crafted with delicate beads, require gentle care․ Clean with a soft cloth and store separately to prevent scratches and tangling, preserving their beauty!
Cleaning Your Bracelet
Daisy chain bracelets, especially those featuring delicate seed beads or pearls, benefit from careful cleaning․ Gently wipe your bracelet with a soft, lint-free cloth to remove dust and oils․ Avoid harsh chemicals or abrasive cleaners, as these can damage the beads and thread․
For more stubborn dirt, lightly dampen the cloth with lukewarm water․ Ensure the bracelet is thoroughly dried afterward to prevent discoloration or weakening of the stringing material․ Regular, gentle cleaning will maintain the vibrancy and beauty of your handcrafted piece!
Storing Your Bracelet to Prevent Damage
Proper storage is crucial for preserving the integrity of your daisy chain bracelet․ Store it in a soft pouch or jewelry box, separated from other items to prevent scratching or tangling․ Avoid exposing it to direct sunlight or extreme temperatures, which can fade colors and weaken the thread․
Humidity can also be detrimental, so consider including a silica gel packet to absorb moisture․ Careful storage ensures your delicate beaded creation remains beautiful for years to come!